Building your own home is often the most significant financial and emotional milestone for any Indian family. However, if you are wondering how to start house construction in India in 2026, you likely already know that the landscape has changed. With shifting economic trends, rising material costs, and stricter municipal regulations, a “trial and error” approach can lead to massive financial losses and mental stress.
In 2026, starting a project without a professional roadmap is a recipe for disaster. Many first-time homeowners face common problems like unclear budgets that balloon mid-way, contractor disputes over hidden costs, or poor quality of work that only surfaces after the first monsoon. These issues often stem from a lack of awareness regarding the necessary steps to start building a house in India.
This article provides a comprehensive, people-first guide designed for the average Indian homeowner. You will learn the entire journey—from verifying your plot documents to the final coat of paint and handover. By following this clear, step-by-step guide on how to start house construction in India, you can ensure your dream project remains on track, within budget, and built to last for generations.
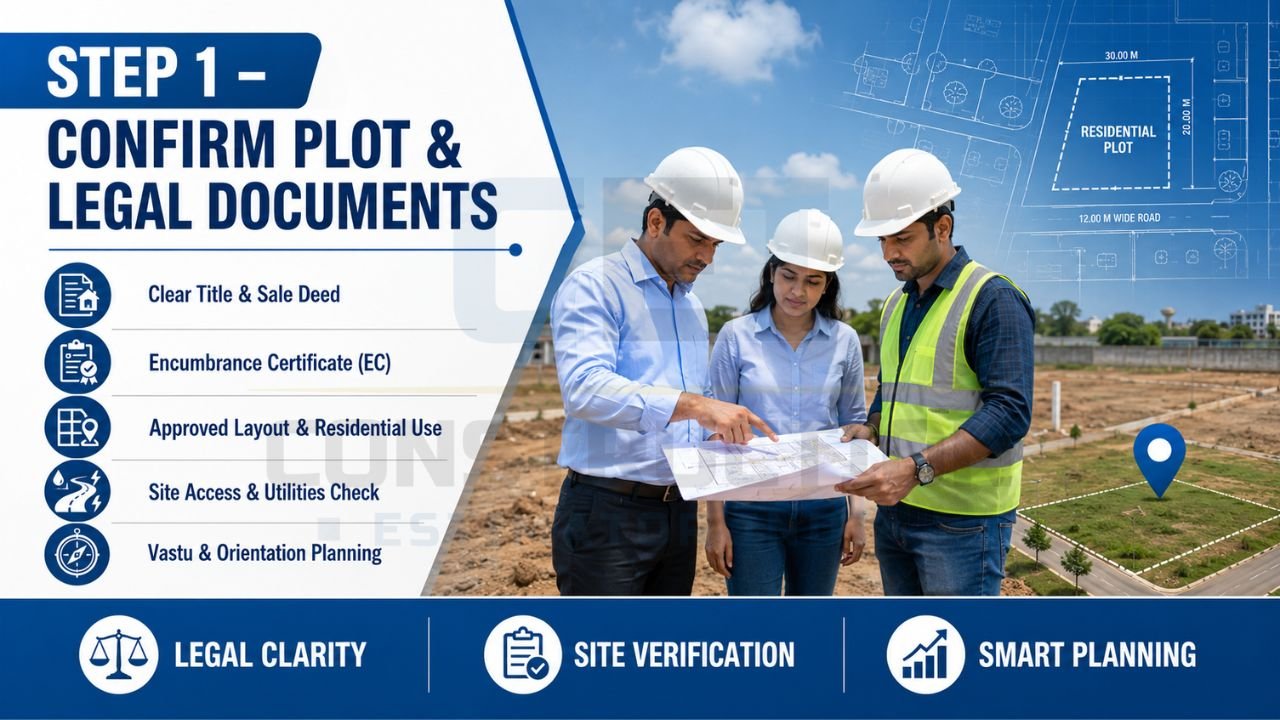
Step 1 – Confirm Your Plot and Legal Documents
The foundation of a successful home isn’t bricks; it is the land it stands on. Before you even think about design, you must complete a thorough house construction checklist India for your plot.
Document Verification
You must ensure the land has “legal clarity” with a clear title deed and a registered sale deed. It is critical to obtain an Encumbrance Certificate (EC) to prove the land is free from any legal or monetary liabilities. Verify that the plot is part of a layout sanctioned by the local development authority and that the land use is designated for residential purposes.
Physical Site Checks
Once the papers are clear, conduct a basic site assessment:
- Location & Access: Ensure there is proper road access for heavy machinery like JCBs or concrete mixers.
- Orientation: Many Indian homeowners prefer Vastu-compliant orientations for natural light and ventilation.
- Utilities: Check for proximity to electricity poles, water supply lines, and drainage outlets.
Before starting construction, it helps to know your approximate cost. See our construction estimation services in India here.
Step 2 – Set a Realistic Budget and Contingency
A common mistake among Indian homeowners is budgeting only for the “bricks and mortar” but forgetting that finishing costs (flooring, plumbing, lighting) can consume 30% to 50% of the total budget.
To set a realistic budget, you must account for:
- Land Cost: (If not already owned).
- Construction Cost: Civil structure and finishes.
- Approvals & Permits: Government fees and legal documentation.
- Professional Fees: Architects, structural engineers, and consultants.
- Utilities: Borewell, septic tank, and electrical connections.
In 2026, material prices are volatile. It is strongly recommended to keep a 10% to 15% contingency fund for “unforeseen expenses” or price escalations during the 10–14 months it typically takes to build. For a detailed house construction cost estimate in India, read our full guide.
Step 3 – Do Soil Testing and Get Foundation Recommendations
Many homeowners skip soil testing to save a few thousand rupees, but in regions like Uttar Pradesh or Delhi NCR, sandy soil and high groundwater can be a nightmare. Soil testing determines the “safe bearing capacity” of your land and the depth your foundation needs to reach.
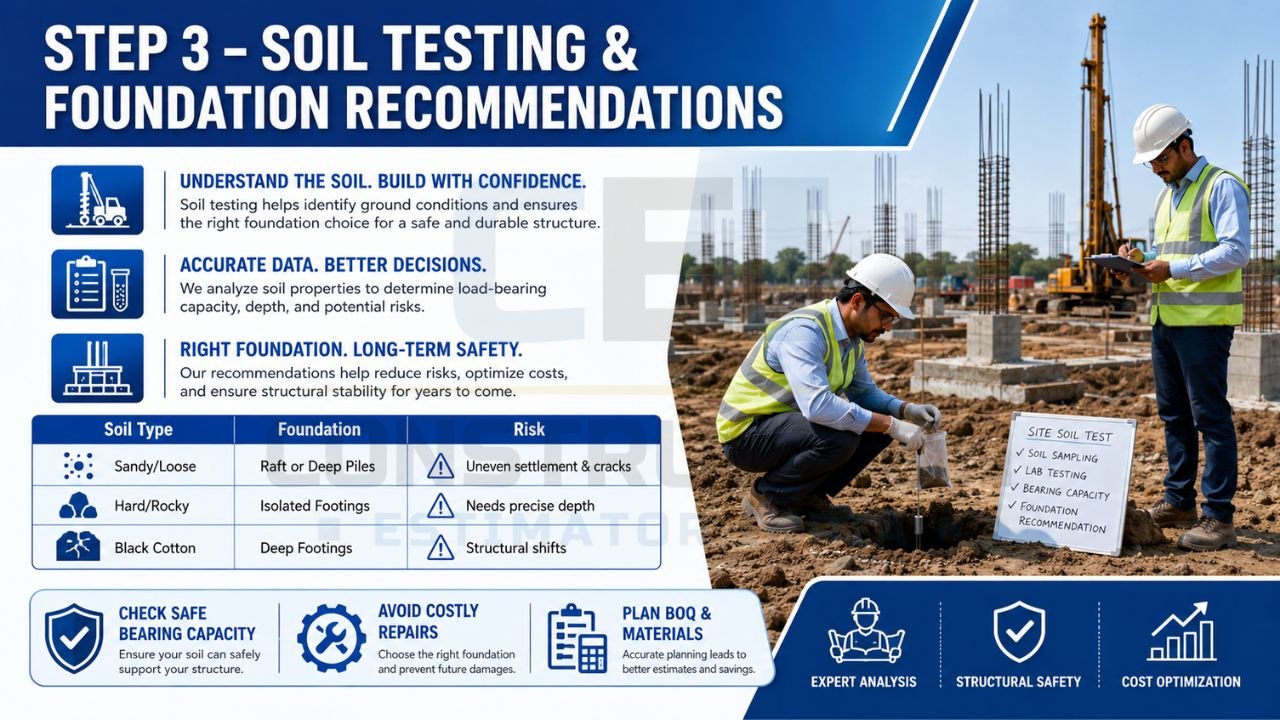
| Soil Type | Common Foundation | Risk if Skipped |
|---|---|---|
| Sandy/Loose | Raft or Deep Piles | Uneven settlement & wall cracks |
| Hard/Rocky | Isolated Footings | Lower cost, but requires exact depth |
| Black Cotton | Specialized Deep Footings | Massive structural shifts |
A proper construction BOQ and material calculation ensures you order the right amount of materials for the foundation and avoid wastage.
Step 4 – Hire a Qualified Architect and Structural Engineer
In 2026, home construction requires meticulous planning to navigate stricter regulations. Your core team should consist of professionals who provide more than just drawings.
- The Architect: They turn your requirements (e.g., number of rooms, G+1 vs G+2) into a functional floor plan. They also help with “Green Building” designs to reduce future electricity bills.
- The Structural Engineer: They design the “bones” of your house—the columns, beams, and slabs—ensuring the structure can withstand earthquakes and heavy loads.
When hiring, always check their past project references and ensure they are registered with relevant local or national professional bodies.
Step 5 – Get Building Plan Approvals and Permissions
Before you start digging, you need the “green light” from the government. Building approvals and permissions India are governed by local bye-laws that vary significantly between states like Maharashtra, Karnataka, or Uttar Pradesh.
Standard requirements often include:
- Building Plan Approval: Submitted by your architect to the local municipal corporation or development authority.
- NOCs: You may need No Objection Certificates from the fire department, electricity board, or water authority depending on your building’s height and area.
- FSI/FAR Compliance: Ensuring your built-up area stays within the Floor Space Index limits of your specific zone.
Disclaimer: This is general information. Building rules vary by city; always check exact rules with your local authorities. For official building guidelines, refer to your local development authority or municipal corporation website, such as the UD & IT Department, Government of India – Building Guidelines.
Step 6 – Understand the House Construction Process Step by Step
Understanding the physical house construction process in India helps you monitor progress even if you aren’t an engineer.
- Site Preparation & Excavation: Clearing the land and digging for the footings.
- Foundation & Plinth: Laying the PCC (Plain Cement Concrete) base and the RCC footings. The Damp Proof Course (DPC) is vital here to prevent ground moisture from rising into your walls.
- Super-structure: The RCC frame consisting of columns, beams, and slabs.
- Masonry & Plastering: Building walls with bricks or AAC blocks followed by internal and external plastering.
For a clear step-by-step house construction process in India, see the detailed guide by Magicrete: House Construction Step-by-Step Process in India.
Step 7 – Choose Quality Materials and Avoid Cheap Substitutes
In the humid and hot climates of India, using low-quality materials leads to corrosion, seepage, and structural rot within just 2-3 years.
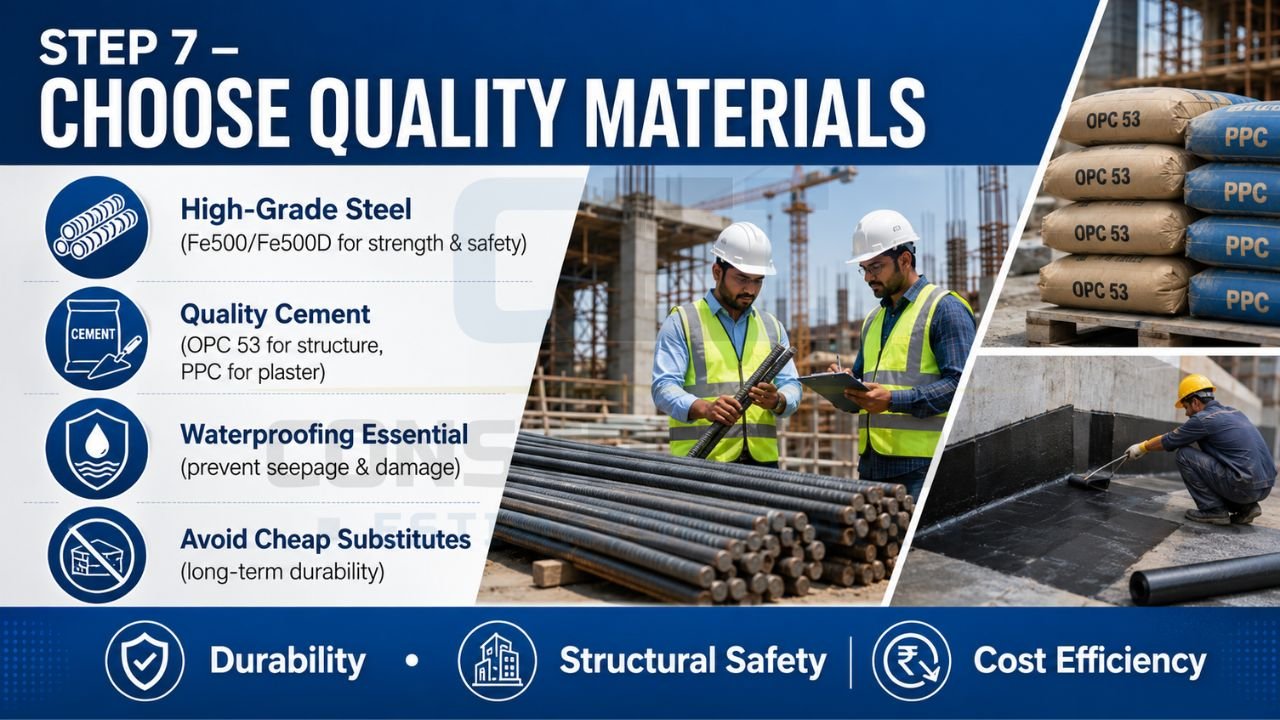
- Steel: Use Fe500 or Fe500D grade TMT bars from reputable brands to ensure earthquake resistance.
- Cement: Choose PPC for plastering and OPC 53-grade for structural RCC work.
- Waterproofing: Never skip waterproofing on terraces and in bathrooms; “paint” is not a substitute for proper membranes.
For a detailed step-by-step guide to building a house in India, refer to JK Cement’s guide: Step-by-Step Guide to Building a House in India.
Step 8 – Prepare a Clear Contract and Timeline with Your Contractor
Verbal deals are one of the biggest risks when learning how to start house construction in India. A written contract is your only defense against over-billing and delays.
Your contract must include:
- A Detailed BOQ: Item-wise quantities and rates so the contractor cannot charge for “unforeseen” extras later.
- Milestone Payments: Tie payments to actual work done (e.g., 20% on completion of foundation, 20% on slab).
- Material Specs: Clearly list the brands of cement, steel, and tiles to be used.
- Penalty Clause: For delays beyond the agreed handover date.
Step 9 – Monitor Construction Progress and Quality Yourself
Regular supervision is essential to ensure the contractor follows the structural drawings and material specifications.
- Curing: Ensure concrete slabs and brick walls are kept wet for at least 7 to 10 days. This is the most vital step for strength.
- Level Checks: Use a simple spirit level or water level to ensure window sills and floors aren’t tilted.
- The “Cover” Block: Ensure there is a gap between the steel bars and the formwork so concrete can flow under the steel properly.
Regular supervision and a clear BOQ make monitoring easier. Explore our construction estimation services here.
Step 10 – Finishing, Handover, and Maintenance Tips
Before making the final payment, perform a thorough “snag list” walk-through:
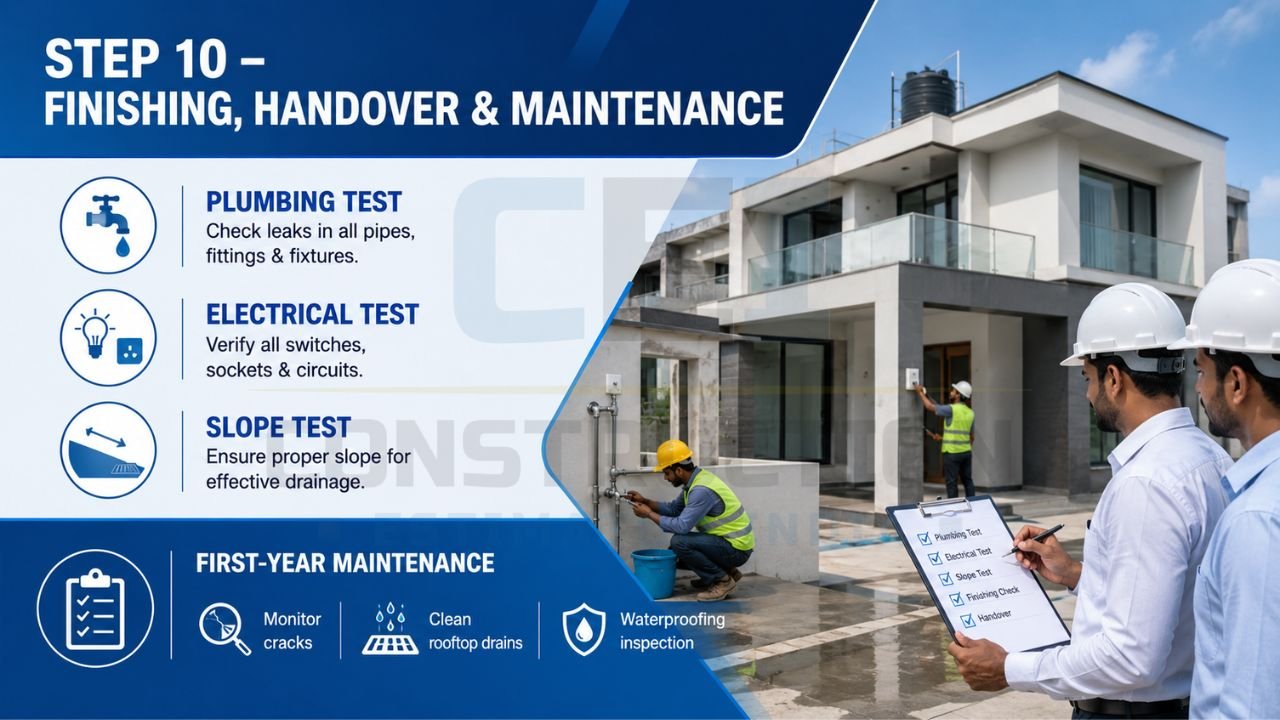
- Plumbing Test: Check for leakages under sinks and at all joints.
- Electrical Test: Ensure every switch and socket works and there are no power surges.
- Slope Test: Pour water in bathrooms and balconies to ensure it flows perfectly toward the drain.
First-Year Maintenance Checklist
- Monitor Cracks: Hairline cracks are common as the house “settles”; fill them during the first repainting.
- Clean Rooftop Drains: Do this before the first monsoon to prevent water logging.
- Waterproofing Check: Inspect ceilings and walls near toilets for any damp patches.
Why Use Construction Estimator India Before You Start Construction?
Professional estimation removes the guesswork from your dream project. By getting an accurate pre-construction report, you gain several advantages:
- Financial Control: Know your total material and labor cost before the first shovel hits the ground.
- Avoid Disputes: A professional BOQ prevents contractors from over-billing or over-ordering materials.
- Bank Loan Planning: Banks require realistic cost breakdowns for loan approvals.
- Resource Management: Reduce material wastage by knowing exactly how many cement bags and steel tons you need.
For a proper cost estimate and BOQ before construction, contact Construction Estimator India on Call / WhatsApp: 8630676890.
Conclusion
Understanding how to start house construction in India is about balancing your aspirations with practical engineering and financial reality. By following this 10-step guide—focusing on thorough legal checks, professional estimation, and strict quality monitoring—you can transform a complex process into a rewarding experience.
Building a home is a marathon. Take your time during the planning phase, hire the right experts, and never skip the estimation stage. Before starting your project, get a clear cost estimate and checklist to avoid surprises.
FAQs – How to Start House Construction in India
What is the very first step to start house construction in India?
The first step is Budget Planning. You must define your financial capacity and basic requirements (built-up area, rooms) before hiring an architect or buying materials.
Do I need soil testing before starting construction?
Yes. Soil testing is mandatory to determine the foundation type and depth, preventing future structural cracks and settlement issues.
How much contingency should I keep in my construction budget?
In 2026, it is recommended to keep a 10% to 15% contingency fund to handle material price spikes and unexpected site conditions.
Do I need both an architect and a structural engineer?
Yes. An architect designs the layout and aesthetics, while the structural engineer ensures the house is safe and structurally sound.
What happens if I skip building approvals?
Skipping approvals can lead to heavy fines, demolition of the structure, or legal issues during the future sale of the property.
How can a construction estimate save me money when starting construction?
It provides the exact quantities needed, preventing over-ordering, contractor over-billing, and unnecessary rework due to poor planning.